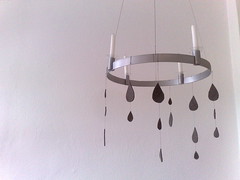
I have this thing for chandeliers. As for this one, since I had seen a similar one in a store, I have been wanting to make one myself.
I generally like the idea of using old objects and materials again, first because I don't like the thought of the throwaway society that we are. Not only are we producing lots of unnecessary waste - also, new things are very often of very poor quality since the producers know that the product will have a short life and therefore just try to produce as cheaply as possible. That's just not sustainable.
Plus, I really like handmade, one-of-a-kind stuff. If I could, I would only buy my furniture from carpenters or other crafty people, who put not only their talent and creativity but also their passion and love in their handmade products.
To cut a long story short: Here's the chandelier tutorial.

Here's what you need:
- Pretty cutlery, like forks, knifes, fish knifes, cake servers or sugar tongs. Sometimes you can get good deals on fleamarkets or garage sales, or ask your grandmother if she has some she doesn't need anymore.
- A bicycle rim, size depending on how you big want your chandelier. You get these at bike stores or flea markets, either used or new, depending on what you prefer.
- Steel rope, about 3-4 meters, depending on how high your ceiling is. I used the kind you get at IKEA to hang curtains.
- Little special screws to fix the rope - building stores offer different possibilities.
- Little silver hooks. This one was a bit tricky, I had gotten some from the building store, but they turned out to be not to be very pretty and just too massive for the fragile cutlery. So I returned them and hand shaped little hooks out of silver wire.
- A massive silver ring, in diameter about 4-5 cm (building store).
- A light bulb plus fitting and power cable (building store).
Now you're all set!
1. First of all, make sure all the pretty forks and knifes and spoons present themselves in the best light and give them a proper polish. Now, make a hole using a drill machine. The hole doesn't have to be big. I asked for help with that ;)

2. Shape the hooks. I cut the wire into pieces of about 5 cm and shaped the hooks with the help of the round end of a wooden spoon.
3. Rims already have holes in them - some people might think they are for the crossing, but no! they are just made for the hooks and the rope. Put the rope through 3 of the holes and fix it with the screws.
4. Put the ends of the 3 ropes one after another through the silver ring and fix them again with the screws, making sure all the rope pieces have the same lenghth so the rim is aligned horizontally.
5. Now you can either put the chandelier directly to the ceiling or, as I did since my ceiling is quite high, use another piece of rope as extension and another silver ring. Fix the power cable and light bulb so it is right in the middle of the chandelier.
6. Best part - put the cutlery on the hooks and hang them on the rim. Done!
7. Wait until it's dark, switch on the light and enjoy! You could also think of other things to be hung on the chandelier...
It might seem a bit tricky, but it's good fun! I would say it's a one-day project, but can be easily done on a weekend.
Happy chandeliering!
Ps. One of the things I like best about it is the shadows:

Pps. I have not uploaded details, but high resolution pics. So if you click on them you see all the details.


